We know you take pride in your ganja. You spare no expense when it comes to fire nugs and top-shelf bud strains. But let’s be real; are you using the right tools to properly prepare that top-shelf smoke sesh? If not, then you’re surely missing out!
A good cannabis grinder is essential for unlocking the true flavor of your herb and helping with proper burning consistency. That’s why today we’ll discuss how to clean a weed grinder. We don’t want any sticky icky buildup messing up its funk on all that perfect chronic ya got. So read on to keep your collection tasting fresh and dank.
Should I Clean My Weed Grinder?
Flavor Fixers, listen up. We know you love your weed grinder. That thing is a game-changer when rolling up a tasty treat. But here’s the thing: you gotta clean that bad boy. You wouldn’t use a dirty fork to eat your steak, would you?
The same goes for your grinder — it deserves a little TLC to keep grinding up that sweet ganja for you. Now, you might be wondering what the best way to clean a weed grinder is. Well, my friend, there are a few options: some folks swear by using alcohol or vinegar, while others use a toothbrush or even throw it in the freezer. But whatever method you choose, just make sure you treat your grinder with the respect it deserves. Trust us — your taste buds will thank you.
Use Coupon Code: TMGFF25 for 25% off

What Do You Need to Clean a Weed Grinder?
You ever find yourself wondering, “Do I really need to clean my weed grinder?” Let us tell you, the answer is a resounding YES. Don’t be fooled by those little bits of green that you see stuck in the crevices. Your grinder can accumulate bacteria and residue that can affect the flavor and potency of your sticky icky.
A Step-By-Step Guide on How to Clean a weed Grinder
If your trusty cannabis grinder starts to stick or just not work as well as it used to, it sounds like it’s high time for a good clean. Here’s a step-by-step guide on how to clean your cannabis grinder and get it back to its prime.
Step 1: Disassemble Your Grinder
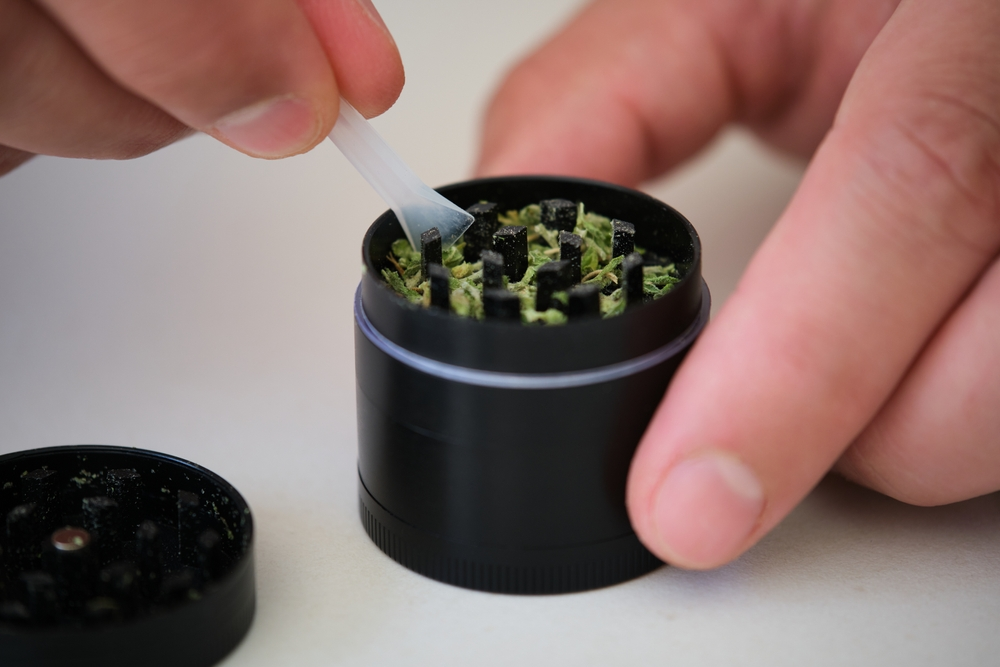
First, separate all the parts of your grinder. Most grinders have a top chamber with grinding teeth, a middle chamber for the ground bud, and a bottom chamber for the kief. Be gentle — you don’t want to lose any precious kief! And if you want a top-quality weed grinder that’s easy to clean and collects that delicious kief, check out our favorite weed grinder, The Magic Grinder.
Step 2: Brush It Out
Grab a small brush. A toothbrush or paintbrush works great. Brush out any leftover plant matter from all the pieces. Don’t forget the nooks and crannies where the good stuff tends to hide.
Step 3: Freeze It
This step is optional but can help loosen stubborn, stuck-on plant matter. Just pop the disassembled grinder in the freezer for about 20-30 minutes. After it’s nice and chilly, give it another good brush.
Step 4: Give It a Bath
Fill a small bowl with isopropyl alcohol (rubbing alcohol) and let the pieces of your grinder soak for about 10 minutes. This will help dissolve any remaining resin. Got a plastic grinder? Skip the soak to avoid damaging it, and use a Q-tip dipped in alcohol instead.
Step 5: Scrub-A-Dub-Dub
After soaking, take a Q-tip and gently scrub any remaining spots. If your grinder is metal, you can use a toothpick to scrape off any stubborn bits.
Step 6: Rinse and Dry
Rinse off all the pieces with warm water to remove any alcohol residue. Then, let them air dry thoroughly before reassembling. You don’t want any moisture messing with your bud.
Step 7: Reassemble and Test
Once everything’s dry, put your grinder back together. Test it out to make sure everything’s moving smoothly. You might need to repeat the cleaning process if it’s still sticking.
With a little TLC, your grinder will return to its top performance, giving you the perfect grind every time.
Maintain Your Weed Grinder Regularly
Maintenance is key. Keeping your weed grinder clean and in tip-top shape will give you smooth and effortless grinding every time. But don’t just clean it once in a blue moon. Make it a habit to scrub that baby well every few weeks.
10 FAQs on Cleaning a Weed Grinder
Here are some FAQs answered with info straight from the Flavor Fix cannabis experts.
1. What is the best thing to clean a weed grinder?
Isopropyl alcohol is your best friend when it comes to cleaning grinders. It’s effective and evaporates quickly.
2. Can you rinse a weed grinder?
Yes, you can. Just make sure it’s rinsed thoroughly and completely dry before using it again.
3. How often should you clean a weed grinder?
It depends on how frequently you use it, but as a rule of thumb, give it a solid clean every 30 to 60 days.
4. How do I clean a grinder to get more kief?
Try popping your grinder in the freezer for about 30 minutes before cleaning. The cold helps detach more kief from the grinder.
5. Can you clean a weed grinder with boiling water?
Here’s a curveball — some folks recommend boiling your grinder in milk. The fat in the milk helps collect the THC, and then you get to enjoy a potent drink afterward.
6. Can I use vinegar to clean a weed grinder?
Vinegar might not be the best choice. It could leave a lingering smell or taste. Stick with isopropyl alcohol for a thorough clean.
7. How do you clean the inside of a grinder?
Disassemble your grinder and soak all parts in isopropyl alcohol for about 30 minutes. Then, scrub each piece with a brush or toothpick.
8. Can weed grow mold in a grinder?
In rare cases, yes. If you leave damp cannabis in your grinder for too long, it could potentially develop mold. Regular cleaning will help prevent this.
9. What happens if you don’t clean your grinder?
You risk gumming up your grinder with resin, making it less effective. Plus, old plant material can affect the taste of your fresh bud.
10. Can you clean a weed grinder with just water?
Water alone won’t get rid of all the sticky resin. But rinsing with warm water after an isopropyl soak can help remove any remaining debris.
That’s all there is to it. Keep your grinder clean, and it’ll keep delivering that perfect grind. Happy toking!
Use Coupon Code: TMGFF25 for 25% off


